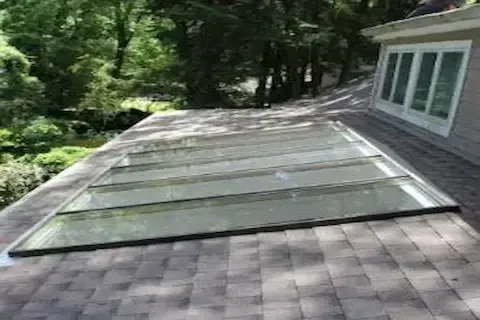
Residential Skylight Installation Steps for Blaine MN
Installing a residential skylight in Blaine MN requires careful planning and execution to handle the region's harsh winter conditions and significant temperature fluctuations. The process involves multiple critical steps from initial measurement and framing to final waterproofing and interior finishing. Understanding these steps helps ensure your skylight installation provides years of natural light without compromising your home's structural integrity or energy efficiency.
Planning and Preparation Phase
Before beginning any skylight installation in Blaine MN, you need to assess your roof's structure and orientation. North-facing skylights provide consistent, indirect light while south-facing installations maximize solar heat gain during winter months. Check local building codes and obtain necessary permits, as Blaine follows Minnesota state requirements for structural modifications.
Measure the intended installation area carefully, accounting for rafter spacing and any existing electrical or plumbing systems in the ceiling cavity. Choose a skylight size that fits between existing rafters when possible to minimize structural modifications. For Blaine's climate, select skylights with low-E coatings and argon gas fills to improve energy efficiency during the region's cold winters.
Gather essential tools including circular saw, reciprocating saw, chalk line, measuring tape, level, safety harness, and appropriate fasteners. Weather conditions matter significantly - avoid installation during precipitation or when temperatures drop below freezing, as sealants and adhesives may not cure properly.
Roof Opening and Framing
Mark the rough opening dimensions on the interior ceiling first, then transfer these measurements to the roof exterior. Use a chalk line to create precise cut lines, ensuring the opening aligns properly with the skylight's rough opening requirements. Most residential skylights require an opening approximately 2-3 inches larger than the actual unit dimensions.
Cut through the roofing materials first, working from the exterior to prevent interior debris. Remove shingles carefully in the surrounding area to expose the underlayment and sheathing. Make the initial cuts with a circular saw, then use a reciprocating saw for detailed cuts around obstacles.
Frame the opening using dimensional lumber that matches your existing rafter size. Install headers and cripple studs as needed to maintain structural integrity. In Blaine's heavy snow load conditions, proper framing becomes crucial for preventing roof collapse or sagging. The framing must support both the skylight weight and potential snow accumulation above the unit.
Check the opening for square and level before proceeding. An out-of-square opening leads to installation problems and potential water infiltration issues. Adjust framing as necessary to achieve perfect dimensions and alignment.
Structural Considerations for Minnesota Climate
Blaine experiences significant snow loads that require additional structural support around skylight installations. Install blocking between rafters to distribute weight loads effectively. Consider the thermal bridging effects where the skylight frame meets the roof structure, as these areas become prime spots for ice dam formation during winter months.
Flashing and Waterproofing Systems
Install ice and water shield membrane around the entire rough opening, extending at least 12 inches beyond the opening on all sides. This step-flashing system prevents water infiltration during Blaine's freeze-thaw cycles that can drive moisture into the smallest gaps.
Apply the skylight's step flashing kit according to manufacturer specifications. Start with the bottom flashing piece, ensuring it extends well underneath the surrounding shingles. Side flashings must overlap the bottom piece and extend up under the side shingles. The top flashing piece, or head flashing, covers the top of the skylight and diverts water around the unit.
Use high-quality roofing sealant designed for Minnesota's temperature extremes. Standard sealants fail when exposed to repeated freeze-thaw cycles, leading to leaks and water damage. Apply sealant to all flashing joints and nail penetrations, creating a continuous waterproof barrier.
Install the skylight unit itself, following the manufacturer's mounting instructions precisely. Most units attach through the nailing flange into the roof sheathing. Ensure the unit sits level and square in the opening before final attachment. The skylight should sit slightly proud of the surrounding roof surface to promote proper water drainage.
Advanced Flashing Techniques
In Blaine's climate, consider installing a secondary water barrier system behind the primary flashing. This backup system catches any moisture that penetrates the first line of defense. Use membrane materials specifically designed for cold climate applications that remain flexible at low temperatures.
Shingle Integration and Exterior Finishing
Reinstall roofing materials around the skylight, working from bottom to top to maintain proper water flow. Cut shingles carefully to fit around the flashing system without creating gaps or overlaps that trap water. Each shingle course must overlap the one below it while integrating seamlessly with the skylight's flashing system.
Install Skylight Installation & Repair trim pieces and any decorative elements according to the manufacturer's specifications. These components not only enhance appearance but also provide additional weather protection around the skylight perimeter.
Apply a final bead of sealant around all exterior joints where the skylight meets the roofing materials. This final seal prevents wind-driven rain from penetrating the installation during Blaine's severe weather events.
Check all sealant applications for completeness and proper adhesion. Cold temperatures can prevent proper sealant curing, so schedule installation during milder weather when possible.
Interior Finishing and Insulation
Install appropriate insulation around the skylight shaft to prevent heat loss during Blaine's cold winters. Use spray foam insulation for irregular spaces and batt insulation for standard cavity dimensions. Maintain proper vapor barriers to prevent condensation issues within the wall assembly.
Frame the skylight shaft if creating a light well to bring natural light deeper into the room. Angle the sides to maximize light distribution while maintaining structural integrity. Install drywall or other finish materials according to local building codes and personal preferences.
Paint or finish the skylight shaft with light-colored materials to maximize light reflection throughout the space. Consider installing trim around the interior opening to create a finished appearance and hide any irregularities in the drywall installation.
Install any interior accessories such as blinds, shades, or remote control operators. These additions improve energy efficiency by providing insulation during extreme weather while maintaining user control over natural light levels.
Moisture Management
Install proper ventilation around the skylight shaft to prevent condensation buildup during Blaine's humid summer months. Adequate air circulation prevents moisture problems that lead to mold growth and structural damage over time.
Quality Control and Testing Procedures
Conduct thorough water testing before considering the installation complete. Use a garden hose to simulate rainfall conditions, checking all flashing joints and sealant applications for leaks. Pay special attention to areas where different materials meet, as these transition points often develop problems first.
Inspect the installation from both interior and exterior perspectives. Look for any signs of improper alignment, gaps in sealant applications, or inadequate flashing coverage. Address any deficiencies immediately while materials and tools remain available.
Test all moving parts including opening mechanisms and hardware operation. Lubricate hinges and operators as recommended by the manufacturer to ensure smooth operation throughout Blaine's temperature extremes.
Document the installation with photographs showing proper flashing installation and sealant applications. This documentation proves valuable for warranty claims and future maintenance reference.
Maintenance Requirements for Northern Climates
Schedule regular inspections of your skylight installation, particularly after severe weather events common in the Blaine area. Check sealant conditions annually and reapply as needed to maintain waterproof integrity. Cold temperatures cause sealants to shrink and crack, creating entry points for moisture.
Clear debris from around the skylight during fall months to prevent ice dam formation. Accumulated leaves and branches trap snow and ice, increasing the risk of water infiltration during spring melts.
Monitor interior areas around the skylight for signs of moisture infiltration including water stains, peeling paint, or condensation buildup. Address any problems immediately to prevent extensive damage to surrounding building materials.
Professional maintenance services can identify potential problems before they become costly repairs. Annual professional inspections ensure your skylight installation continues providing natural light while protecting your home's interior from Blaine's challenging weather conditions.
Professional Installation Considerations
While experienced homeowners can complete skylight installations, the complexity of proper flashing and waterproofing often justifies professional installation, especially in Blaine's demanding climate. Professional installers understand local building codes, weather patterns, and proven techniques for preventing ice dam formation around skylights.
Consider professional installation for complex roof configurations, structural modifications, or when installing multiple skylights simultaneously. Professional teams complete installations more quickly, reducing weather exposure time during the process.
Professional installations typically include warranties covering both labor and materials, providing protection against installation defects that lead to water damage. This warranty coverage proves particularly valuable given the high cost of repairing water damage in finished living spaces.
