Common Roof Leak Repair Steps for Blaine Minnesota
Fixing a roof leak in Blaine, Minnesota starts with finding the exact entry point, drying out any wet decking, replacing damaged or missing shingles, and resealing flashing around chimneys, vents, and valleys. Minnesota's freeze-thaw cycles and heavy snow loads make these repairs more urgent than in milder climates. Acting quickly prevents rot, mold, and structural damage inside your home. Most repairs follow a clear sequence whether you hire a contractor or assess the damage yourself first. The steps below outline the standard process used by roofing professionals throughout the Blaine area.
Step 1: Locate the Leak Entry Point
Water travels along rafters and sheathing before dripping into your living space, so the visible wet spot on your ceiling is rarely directly below the source. Start in your attic with a flashlight during or after rain. Look for water stains, dark streaks on rafters, or actual dripping. Trace the moisture uphill toward the ridge. Common entry points in Blaine homes include deteriorated flashing around chimneys and plumbing vents, cracked pipe boot seals, and shingles lifted by high winds. Mark the location from inside before going onto the roof so you can work efficiently and safely.
Step 2: Inspect the Roof Surface From Outside
Once you have an approximate location from the attic, inspect the exterior surface. Look for cracked, curling, or missing shingles in that zone. Check flashing seams for gaps or rust. Examine ridge caps and valleys where two roof planes meet, since these areas concentrate water flow and are frequent failure points. In Blaine, ice dam damage along eaves is also a leading cause of leaks — look for shingles that appear lifted, stained, or granule-bare near the roofline. If your roof slope is steep or you are not comfortable on ladders, document what you can from the ground and rely on a professional inspection.
Step 3: Dry the Roof Deck Before Repairs
Repairs made over wet or saturated wood sheathing will fail prematurely. If the decking beneath the damaged shingles is wet, it must dry completely before new materials are installed. In warm months this may take one to two dry days. In late fall or winter, drying can be much slower given Minnesota's cooler temperatures. If the wood has softened, sponges when pressed, or shows black mold growth, those sections of decking must be cut out and replaced with new OSB or plywood before proceeding. Skipping this step traps moisture under the new installation and accelerates rot.
Step 4: Remove and Replace Damaged Shingles
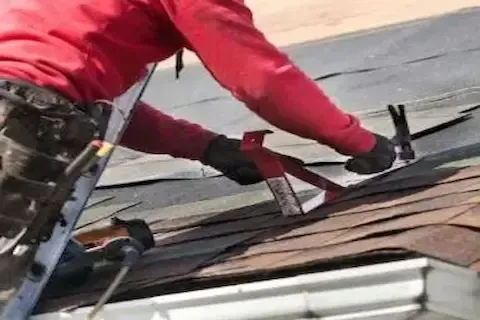
Carefully lift the edges of surrounding shingles and remove the nails holding the damaged pieces using a flat bar. Slide out the old shingles without tearing the underlayment beneath unless it is also compromised. Cut replacement shingles to match and slide them into position, aligning tabs with adjacent courses. Nail each shingle with four roofing nails placed just below the adhesive strip. Seal the nail heads and any exposed edges with roofing cement. Match shingle color and profile as closely as possible — a common challenge on older Blaine homes where original product lines may be discontinued. For Roof Repair work involving more than a few shingles, a licensed contractor ensures warranty compliance and proper installation.
Step 5: Reseal or Replace Flashing
Flashing failures account for a large percentage of chronic roof leaks in Minnesota homes. Step flashing along sidewalls, counter flashing at chimneys, and pipe boot collars all degrade over time from UV exposure and thermal movement. Remove old dried caulk and roofing cement from the flashing joints. If the metal itself is rusted through or bent away from the roof surface, replace it entirely. Apply fresh roofing sealant rated for exterior use and press the flashing firmly into position. Chimney flashing on Blaine homes is especially vulnerable because brick expands and contracts at a different rate than the surrounding roofing materials, creating gaps over time.
Step 6: Check and Repair Underlayment If Needed
The underlayment layer between your shingles and decking acts as a secondary moisture barrier. If the felt or synthetic underlayment beneath the repair zone is torn, punctured, or saturated, it should be patched or replaced. Slide a piece of new underlayment under the existing layer if full replacement is not practical for a small area. Overlap seams by at least six inches and secure edges before reinstalling shingles. In areas prone to ice dams — including many neighborhoods near the Ham Lake border and along the Mississippi River corridor north of Blaine — self-adhering ice and water shield is the better long-term solution along the eaves.
Step 7: Test the Repair and Monitor
After completing repairs, test your work before the next natural rain event if possible. Have someone run water from a garden hose over the repaired area in sections while you watch from inside the attic. This lets you confirm the leak is sealed without waiting for weather. After the first real rainstorm, re-inspect the attic and any previously stained ceiling areas to verify no new moisture is present. Keep records of repairs, including photos and material details, as documentation supports future warranty claims and is useful if you sell the property. Blaine homeowners who maintain repair records often have an easier time with insurance claims after storm events.
